Documentation
Enroll your first machine
Enrolling a machine means installing VIGIL Mesh, then authorising that device in your workspace. The “Add a machine” assistant provides a single-use key, passed to the client through stdin or a QR code, never through process arguments. Once the account is ready, you explicitly attach one or more networks; no inbound port is opened.
Where to start the enrollment
Everything happens in the console, on the Networks page. The Machines panel lists the devices already present and carries, in the top right, the button that opens the enrollment assistant.

The assistant, screen by screen
The assistant fits on a single screen, in three moves: choose the platform, install the client, connect the machine. The enrollment key is generated as soon as it opens — it is single-use and expires after one hour.
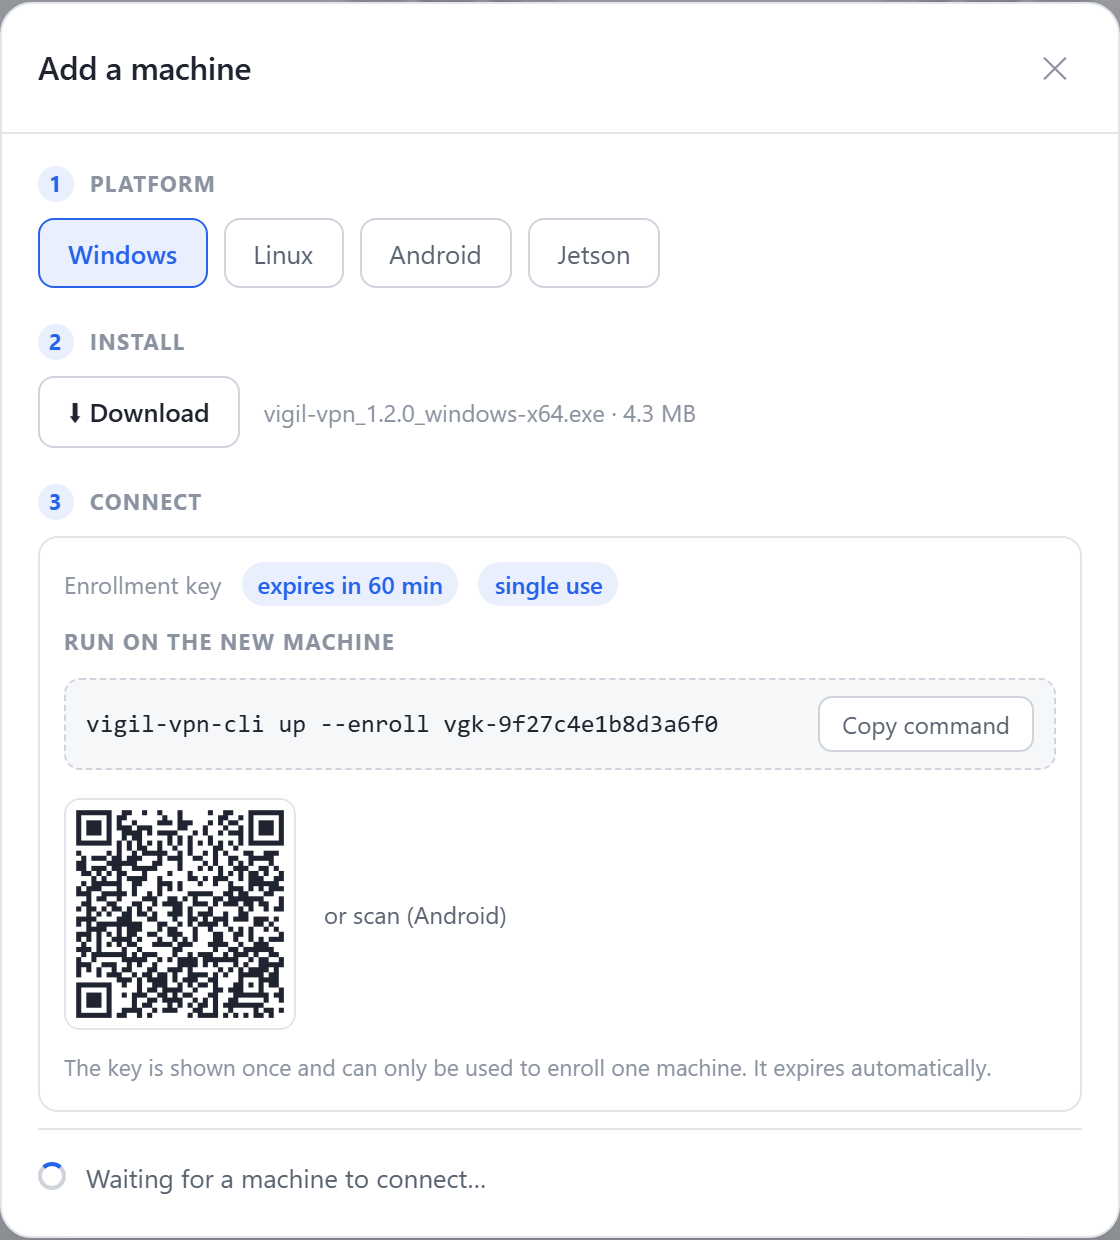
- Choose the platform of the machine to connect — the client offered and the command adapt to it.
- Download the client for that platform; on Linux and Jetson a ready-to-copy install command appears instead.
- The key is single-use and expires in 60 minutes: issued when the assistant opens, it authorises a single join.
- The single-use key area; pass it only through the client's protected input or through stdin.
- On mobile, scan this QR code from the Android app instead of typing the command.
- The assistant keeps waiting: as soon as the machine connects, it shows up here without refreshing the page.
Enroll step by step
The sequence is the same whatever the machine: install the client, then authorise it with the assistant’s key. The client takes care of the rest — generating the identity, opening outbound sessions, receiving the address and the name.
- 1Choose the platform and download the clientIn the assistant (marker 1), select the machine’s operating system, then download the client (marker 2). Detailed per-platform guides: /en/docs/install-windows, /en/docs/install-linux, /en/docs/install-android.
- 2Install the client on the machineOn the target machine, install the downloaded client. On Linux and Jetson the install command is provided; on Windows, run the installer; on Android, open the APK.
- 3Enroll, then attach networksPass the key through the client's protected input or stdin (marker 4), or scan the QR code on mobile (marker 5). Once the account is ready, explicitly attach every required network.
- 4Verify the end-to-end identityThe machine appears in the assistant as soon as it connects. Click “Approve” to confirm its identity and admit it onto the mesh for good.
# 1. Install the client (.deb package)
sudo apt install ./vigil-mesh_<version>_amd64.deb
sudo systemctl enable --now vigil-mesh.service

# 2. Pass the assistant key through stdin, never through argv
read -rsp 'Enrollment key: ' VIGIL_ENROLL_KEY; echo
printf '%s\n' "$VIGIL_ENROLL_KEY" | sudo vigil-mesh account enroll --key-stdin
unset VIGIL_ENROLL_KEY
sudo vigil-mesh account status

# 3. Explicitly attach every required network
sudo vigil-mesh network list
sudo vigil-mesh network attach --workspace <workspace-id> --network <network-id>
# Repeat attach for every additional network you need.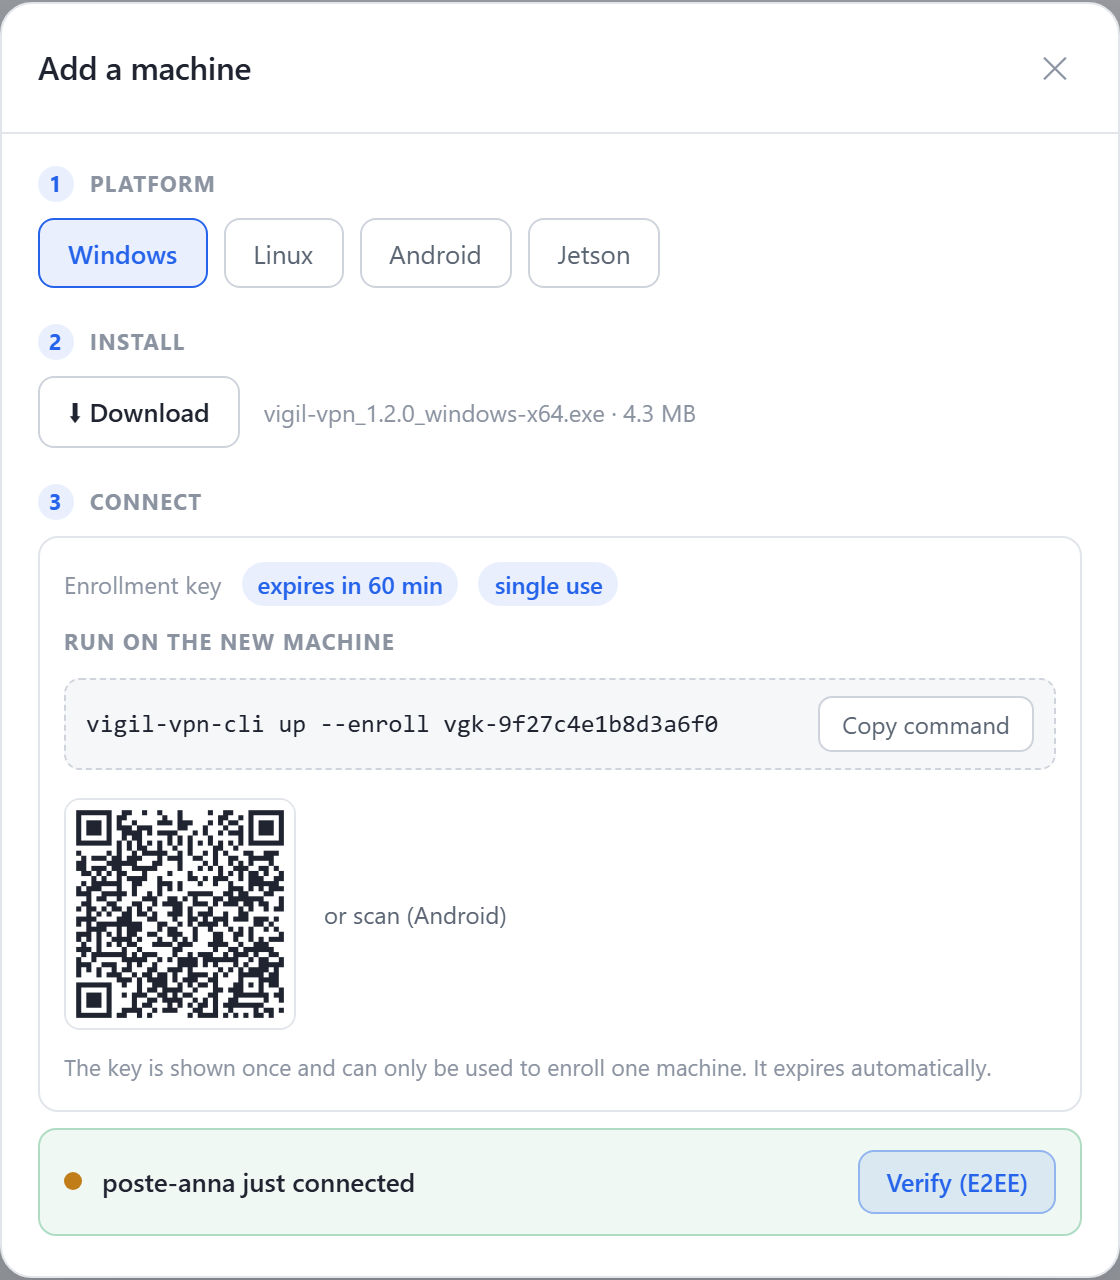
- The machine has connected and is waiting for your validation — here “poste-anna”.
- “Approve” confirms the machine’s end-to-end identity and admits it onto the network.
Once verified, the machine joins the network inventory: it receives a stable overlay address and becomes reachable by its peers.
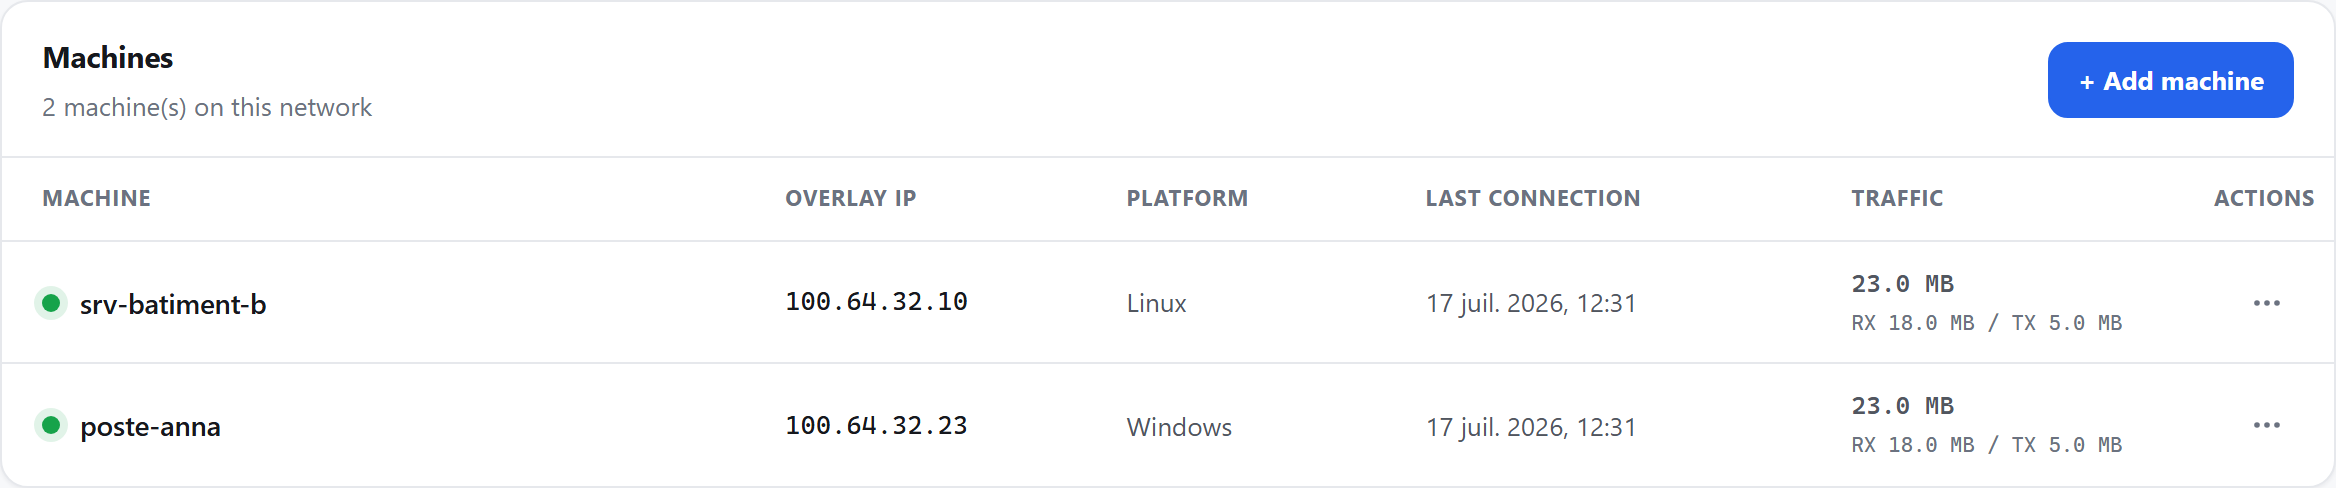
- The enrolled machine appears in the inventory; the green dot means it is online.
- Its stable overlay address (100.64.x.x), assigned automatically at enrollment.
- Its last connection to the network.
- The actions menu: suspend, revoke or rename the device.
Device lifecycle
An enrolled device is not set in stone: its status evolves over its life in the workspace. These states are read and managed from the console, and they determine whether the machine can communicate on the mesh.
- Active: the device is authorized and takes part in the network; it sends and receives traffic according to the access policies.
- Suspended: access is paused, without deleting the device or its identity. Useful for a machine temporarily out of service or under investigation; it can be reactivated.
- Revoked: the authorization is permanently withdrawn. The device immediately loses access to the network and should be re-enrolled, with a new identity, if it must come back.
- Expired: the authorization has reached its term (key past its deadline). The device stays off the network until it is re-authorized.
Enrollment security
Enrollment is not just about handing out a secret. Each machine holds a cryptographic identity, and the control plane distributes a signed view of the network, so a device can neither impersonate another nor forge a topology.
- Ed25519 identity: at enrollment, the machine generates an Ed25519 key pair. The public key becomes its stable identity in the workspace; the private key never leaves the device.
- E2EE verification: the machine is admitted only after its end-to-end fingerprint is confirmed — that is the assistant’s “Approve” step.
- Signed netmap: the controller distributes to each node a signed network map (netmap) describing the authorized peers and their addresses. A node rejects anything not signed by the controller.
- Time- and use-bounded authorizations: the enrollment key is single-use and expires, which limits the exposure window of an enrollment secret.